Table of Contents
Ispirer Website
Ispirer Assessment Tools Overview
Free Trial
How to Use the Assessment Wizard Tool for Databases
Run the Assessment Wizard as Administrator
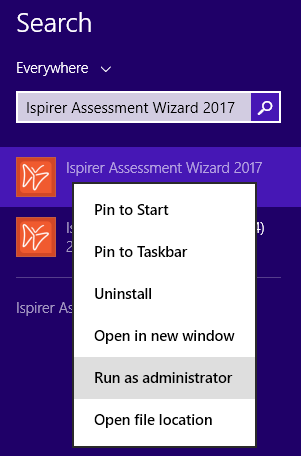
Note: Always run the Assessment Wizard Tool using “as Administrator” option. You can do it using Windows Search panel, like it is done on the screenshot:
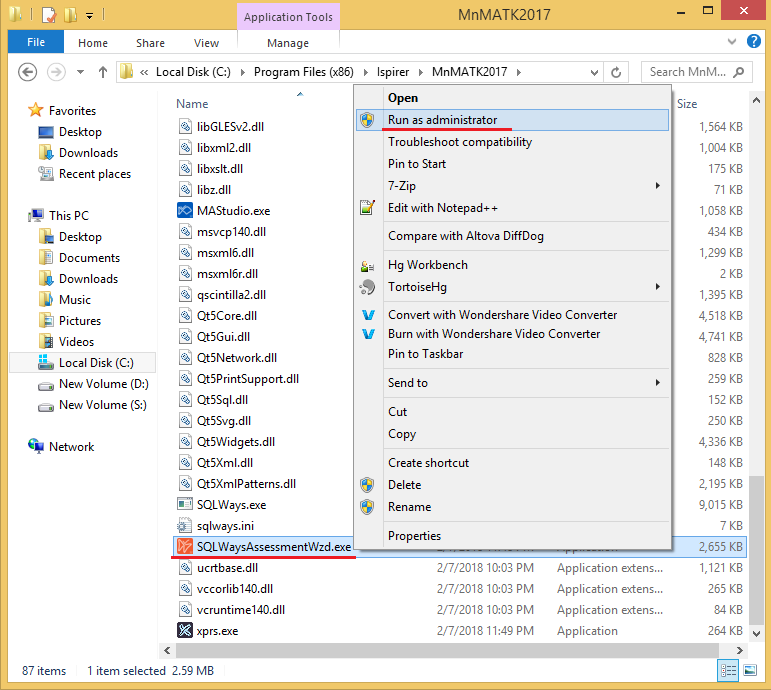
Or you can go to the installation directory, right click on the icon and choose “Run as Administration”.
By default installation directory look like “C:\Program Files (x86)\Ispirer\MnMATK2017”.
Please see the screenshot for your reference:
In other case we can't guarantee that the tool will be able to extract all the required information from the source database and store it in files on the local machine, where you run the assessment process.
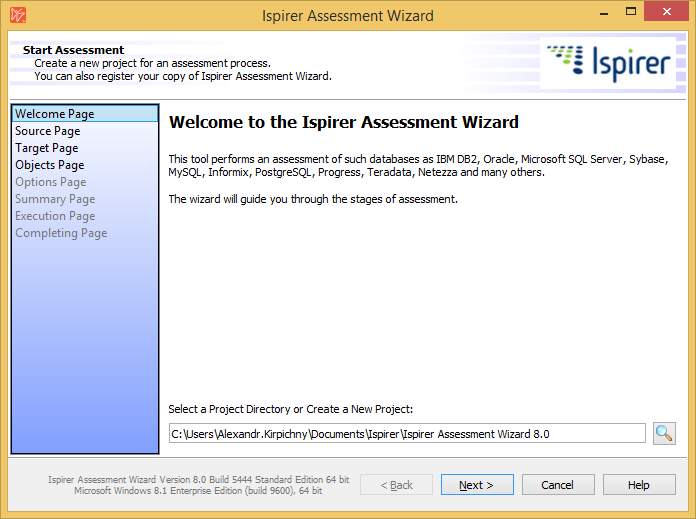
1. Welcome Page
1.1 Project Directory
Once the assessment is completed, sqlways.log file with the log of the assessment process and a “reports” folder with html reports about the assessment process will be stored in this folder.
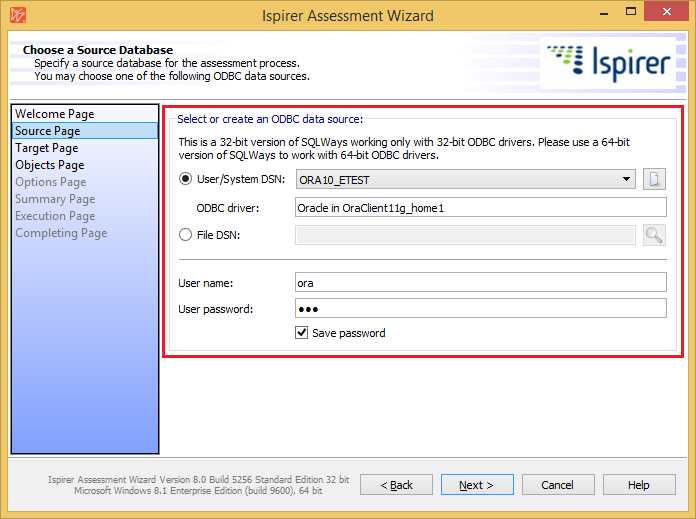
2. Choose a Source Database
Then we need to choose the ODBC connection to the source database that should be migrated. And specify a user and a password that will be used to connect to the source database.
Please note: Our tool works using the ODBC connection to the source database only! It means that before using the Ispirer Assessment Wizard tool you need to install the ODBC driver and tune the ODBC connection to the database that should be analyzed by the Assessment wizard. Some additional information about the ODBC driver installation and configuration can be found on that page: Setting Up Database Connection
Please note: User that we specify on that page should have appropriate rights to make selects from system tables from your source database. More information about source database user privileges can be found on that page: Source User Privileges
3. Choose a Target Database
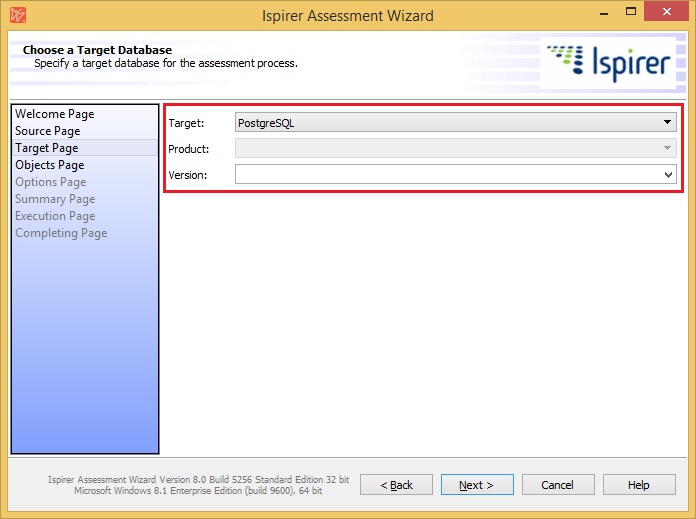
On the next “Choose a Target Database” page you need to specify information about your target database. This information will not impact assessment speed or assessment performance.
On this page you can specify:
- “Target:” - name of the destination database for your project;
- “Product:” - product name, like LUW, AS400, ASE, ASA, IQ & etc.;
- “Version:” - version of the destination database.
4. Objects Page
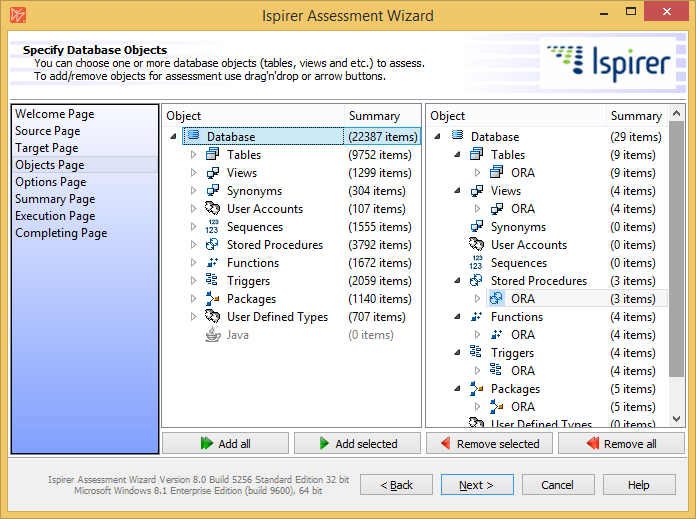
This page allows you to select objects for the assessment.
To select objects for the assessment you can use arrow buttons under the window or simply Drag&Drop the objects from left to right pane.
You can move one object, the whole schema, the whole object type or the whole database.
5. Specify Options
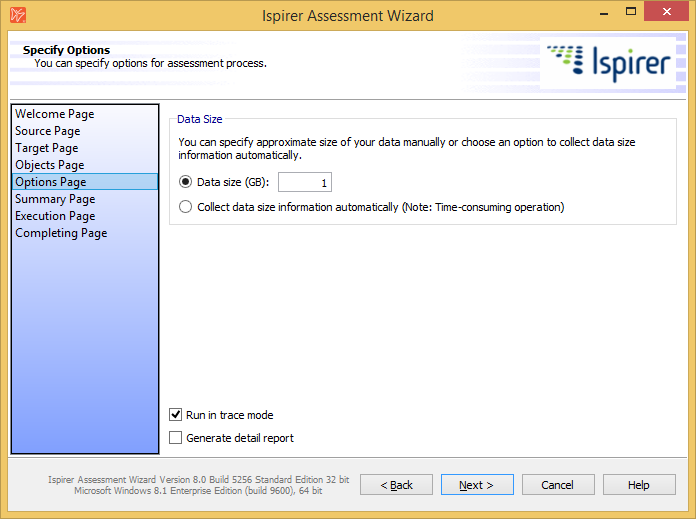
Data size
This option allows to specify data size in Gigabytes. Otherwise, the tool will collect information itself, but this process may take time.
6. Review the Selection
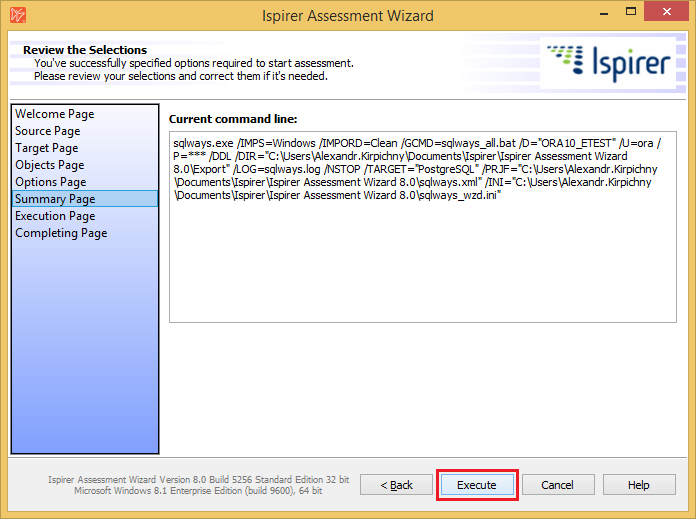
On this page we need to click “Execute” button to start the assessment process and our Assessment Wizard will collect information about the objects selected for analysis.
7. Execution Status
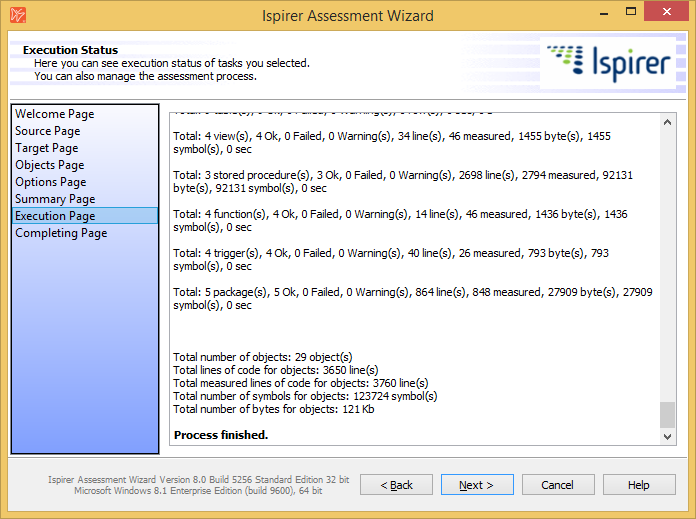
On the “Execution Status” page you can check how assessment process is being performed.
The tool depicts each object while collecting the metrics and provides total statistics at the end of the log.
The same information can be found in sqlways.log file in the project directory.
8. Completing Page
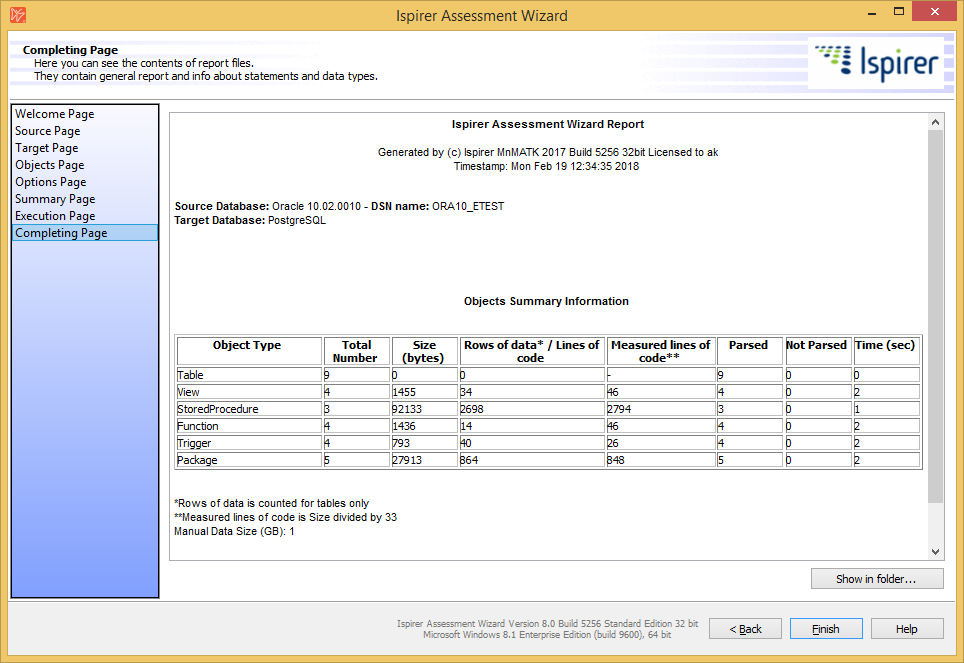
Here you can see the Assessment report in table format showing information on the number of objects, their types (Tables, Views, Stored Procedures & etc.), the number of lines of code and the size of data, and etc.
Similar information can be found in the “reports” folder in the project directory. There is a set of html files that contain the metrics.
Information that is stored in the html files should be sent to our business managers for analysis.
Other Questions
These steps describe how to generate assessment reports for the source database using Ispirer Assessment Wizard tool. If you have any additional questions or face any difficulties please contact our support team: support@ispirer.com

