Table of Contents
Ispirer Website
Ispirer Toolkit Overview
Free Trial
How to Use the Ispirer SQLWays Wizard Tool
Run the SQLWays Wizard as Administrator
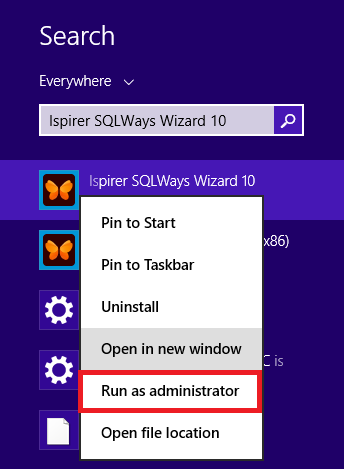
Note: Always run the SQLWays Wizard Tool using “as Administrator” option. You can do it in Windows Search panel, like it is done on the screenshot:
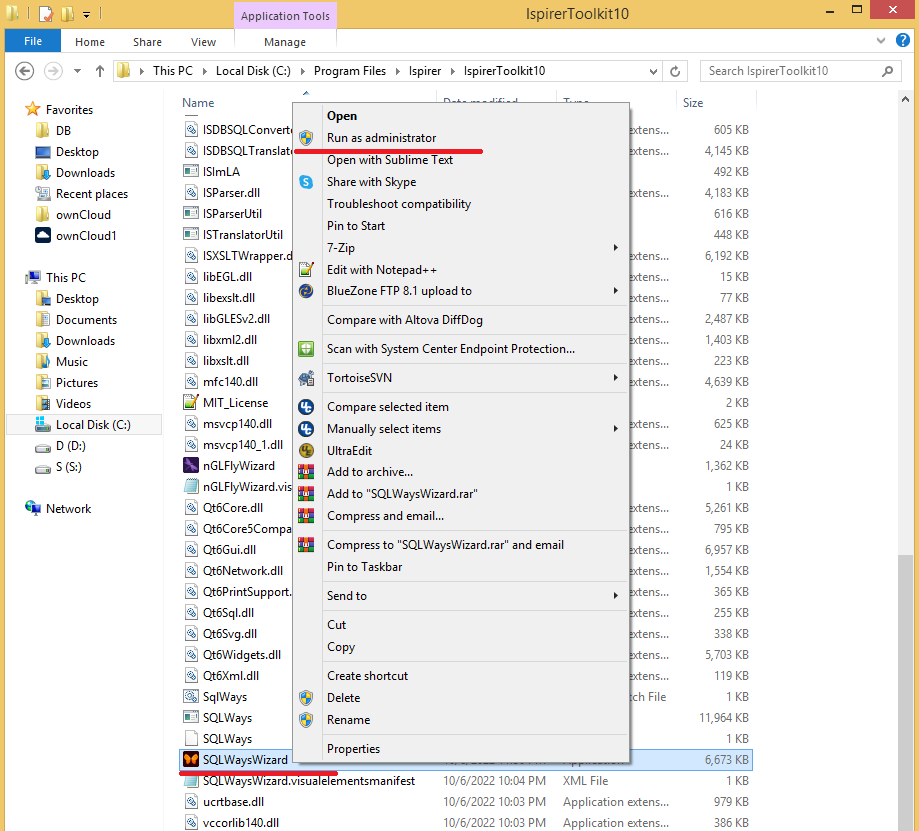
Or you can go to the installation directory, right click on the icon and choose “Run as Administrator”.
By default installation directory look like “C:\Program Files\Ispirer\IspirerToolkit10”.
Please see the screenshot for your reference:
In other case we can't guarantee that the tool will be able to extract all the required information from source database and store it in files on the local machine, where you running the assessment process.
1. Welcome Page
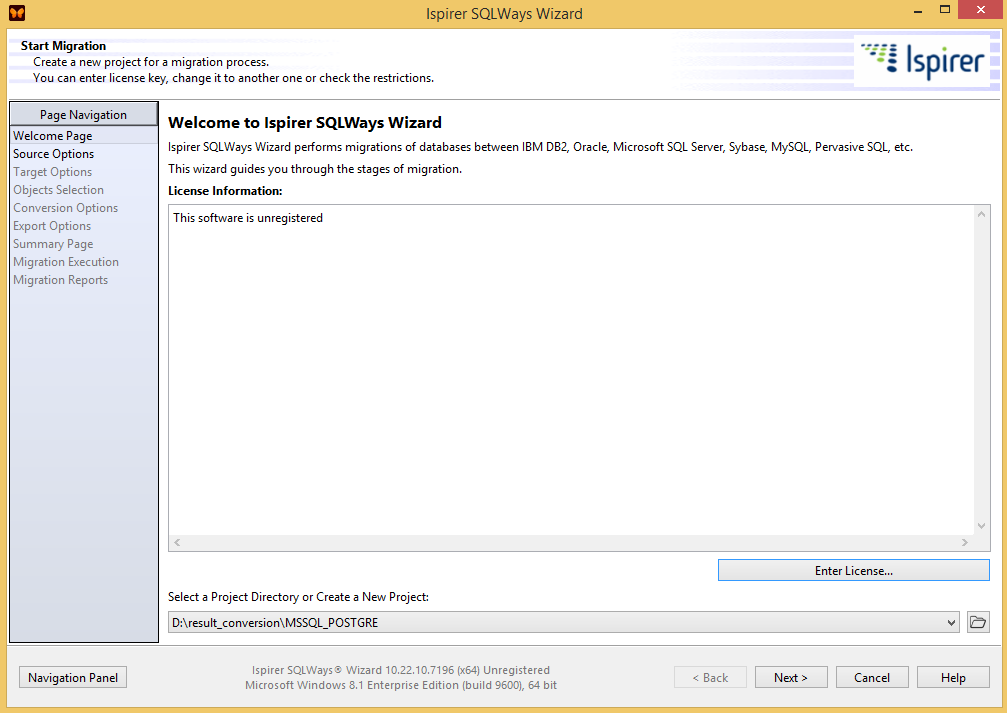
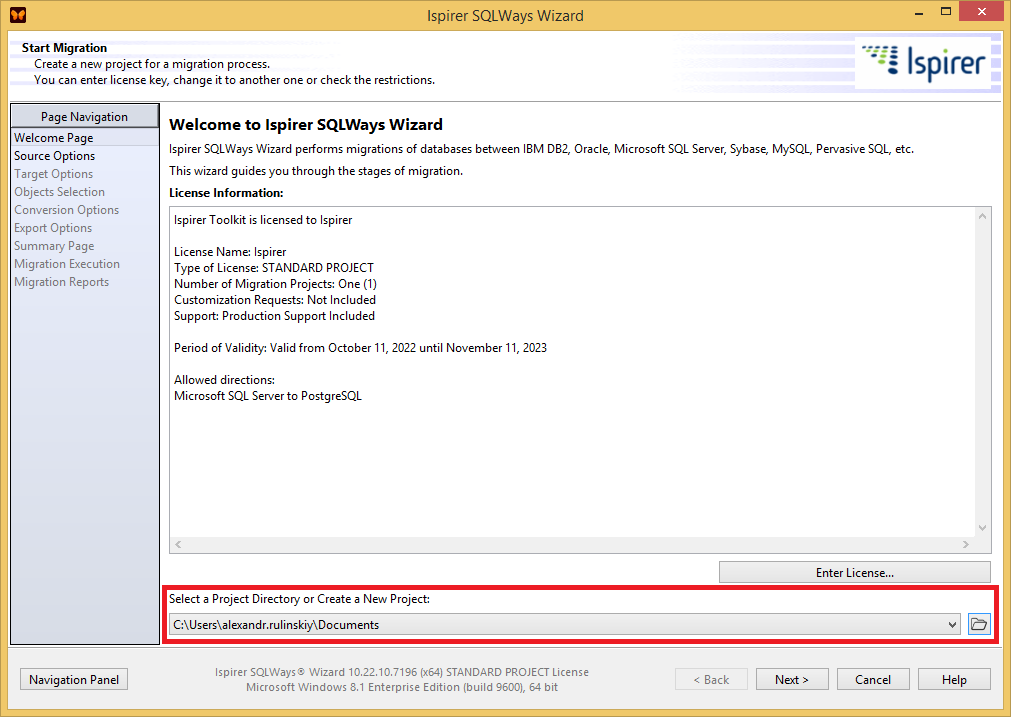
On the first page of the SQLWays Wizard tool we need to enter the license information and provide the project directory.
1.1 Enter the License Information
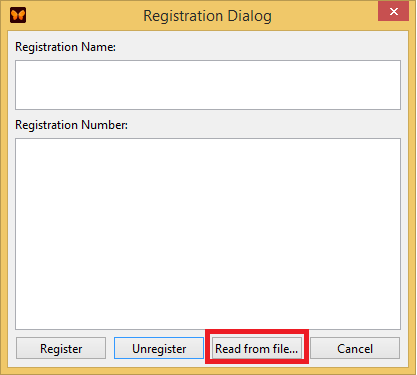
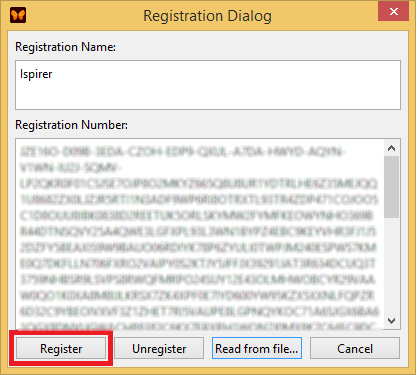
To register the tool we need to click “Enter License” button and in the opened window click “Read from file”.
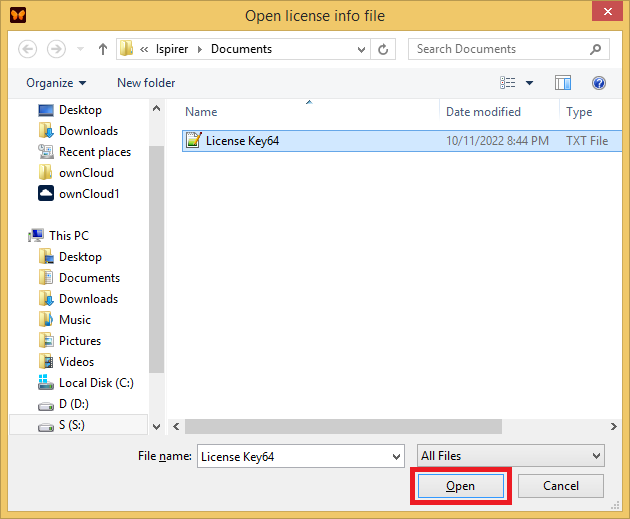
After that we need to find the file with the license and open it.
Then registration name and registration number should appear in appropriate windows and you will need to click “Register”:
1.2 Project Directory
After the tool registration we need to provide the project directory. In this directory our tool will generate project file that will store information about the current migration process.
Please note: you can get the demo license of this tool at our official web site www.ispirer.com
2. Choose a Source Database
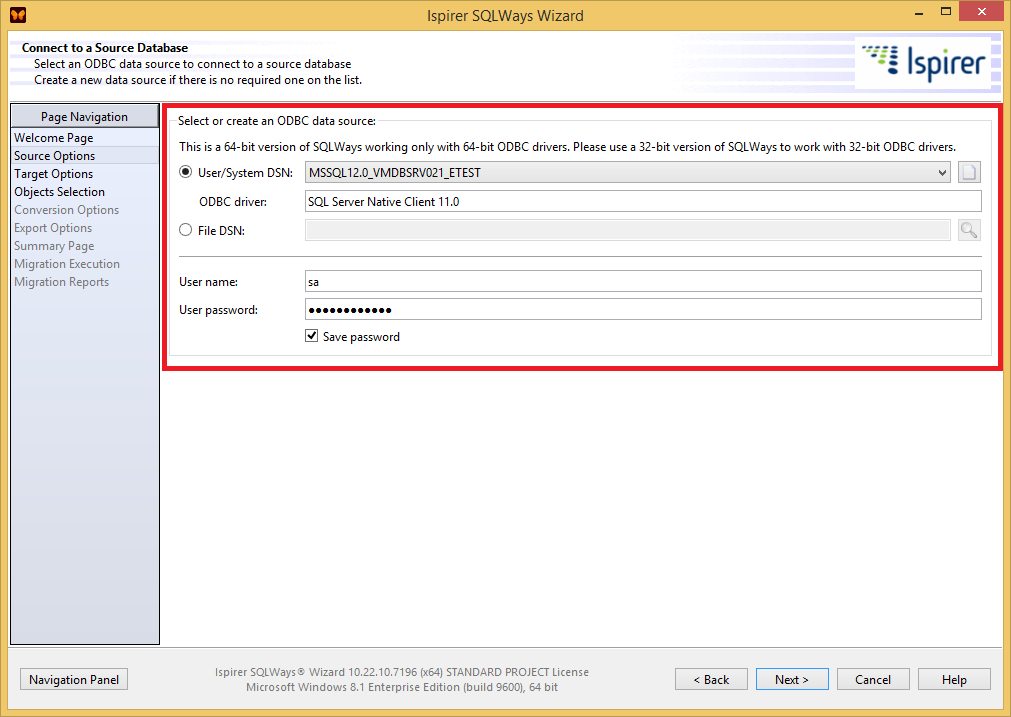
Then we need to choose the ODBC connection to the source database that should be migrated. And specify a user and a password that will be used to connect to the source database.
Please note: Our tool works using the ODBC connection to the source database only! It means that before using the SQLWays Wizard tool you need to install the ODBC driver and tune the ODBC connection to the database that should be migrated. Some additional information about the ODBC driver installation and configuration can be found on that page: Setting Up Database Connection
Please note: User that we specify on that page should have appropriate rights to make selects from system tables from your source database. More information about source database user privileges can be found on that page: Source User Privileges
3. Choose a Target Database and Specify Import Options
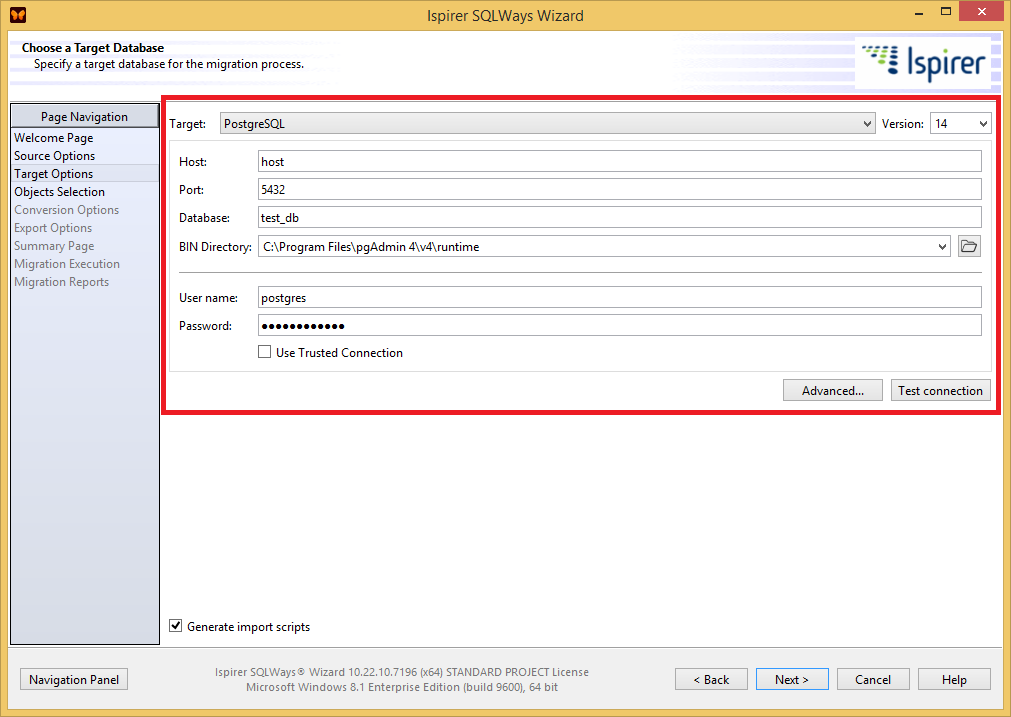
To be able to make an import into the target database, we need to choose the required database from the list of the supported databases, on a “Choose a Target Database” page. And specify correct information about the target database, for example, server name, database name, user name and a password.
Then we need to specify the Bin Directory. This is the path where native utility of the target database is stored on your local machine where Ispirer Migration and Modernization Toolkit is installed. It means that to be able to make an import into the target database you need to have native utility installed on the machine where you run the conversion.
For more information about the databases and their native utilities, that will be used by our tool, please refer to that link:
Databases and their native utilities
This information will be used by our tool to generate correct command lines to the native utilities of the target database.
4. Specify Database Objects
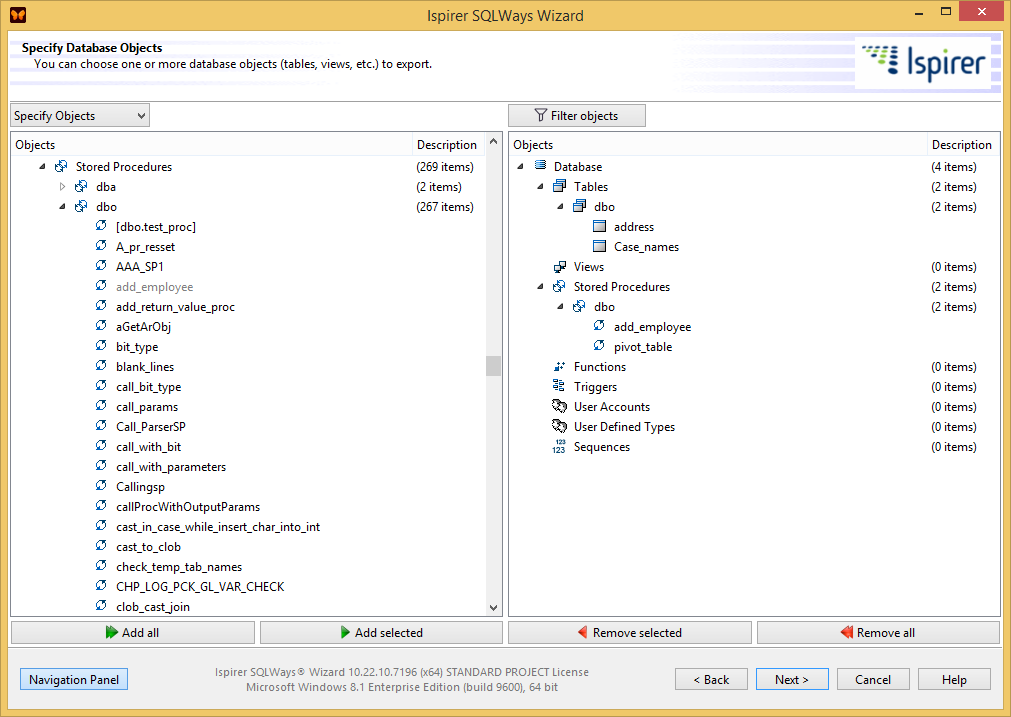
Next step is to specify objects for conversion from the list of objects that our tool was able to extract from source database. To select objects you can just drag-n-drop the required objects to the right pane of the tool. Or you can select objects using buttons at the bottom of the tool:
Refresh Object List
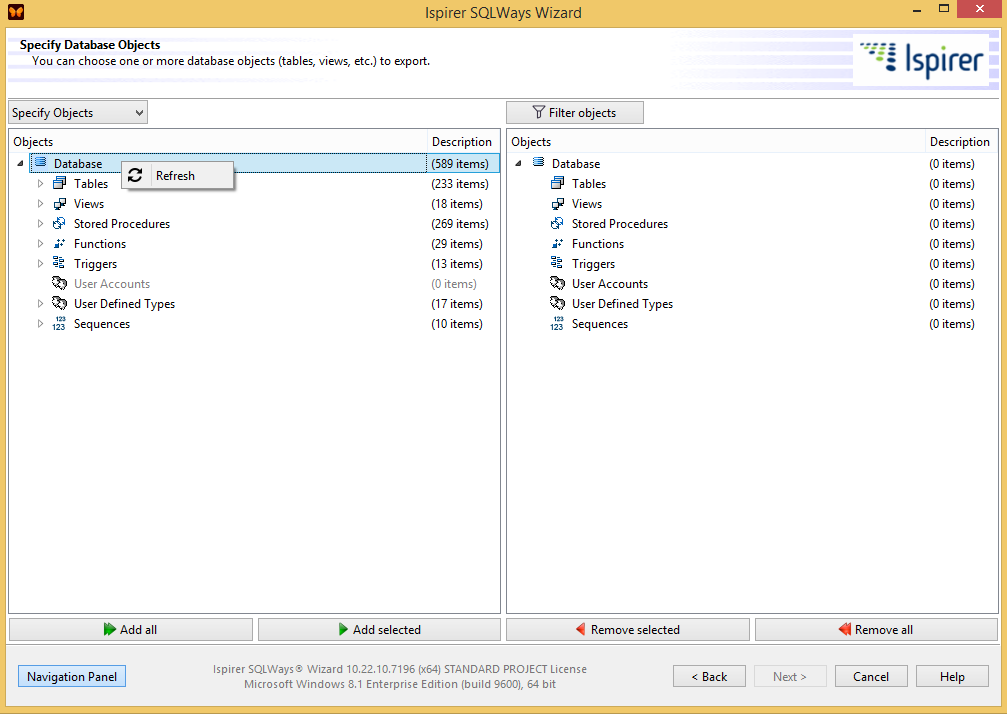
If during the migration process the list of objects was updated, for example some additional objects were created or dropped from the database, you can refresh the list of extracted objects. To do that just right click on the required object type or on the “Database” branch and click “Refresh” button, like it is shown on the screenshot:
5. Specify DDL and Data Options
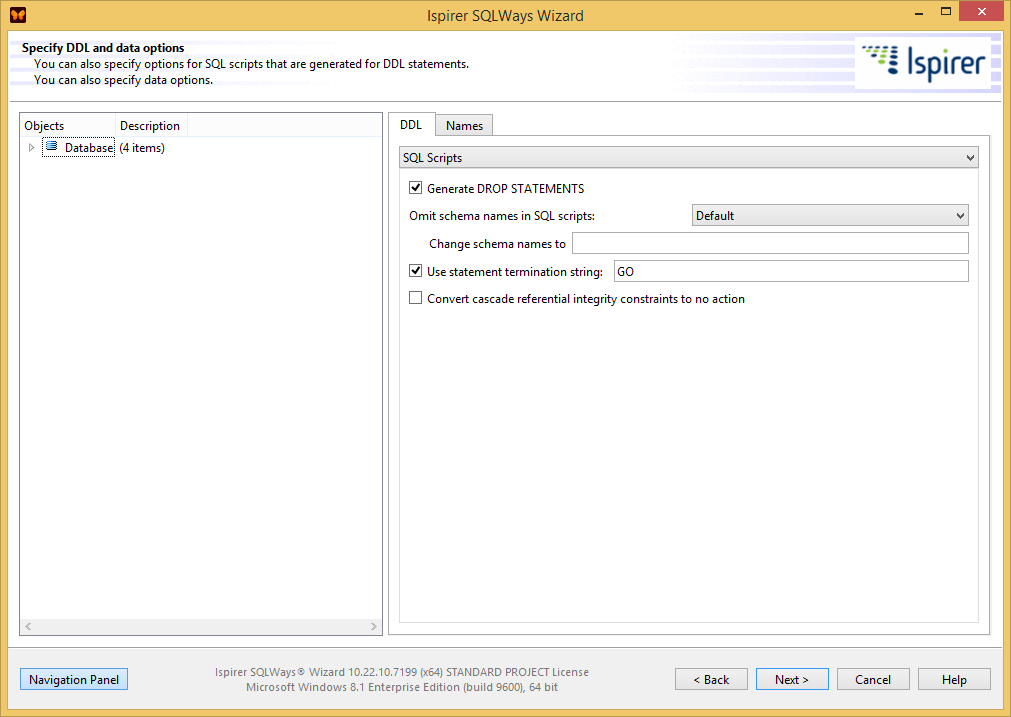
If required, you can specify different options that can be used to customize the conversion process. These options can be found on the “Specify DDL and Data Options” page:
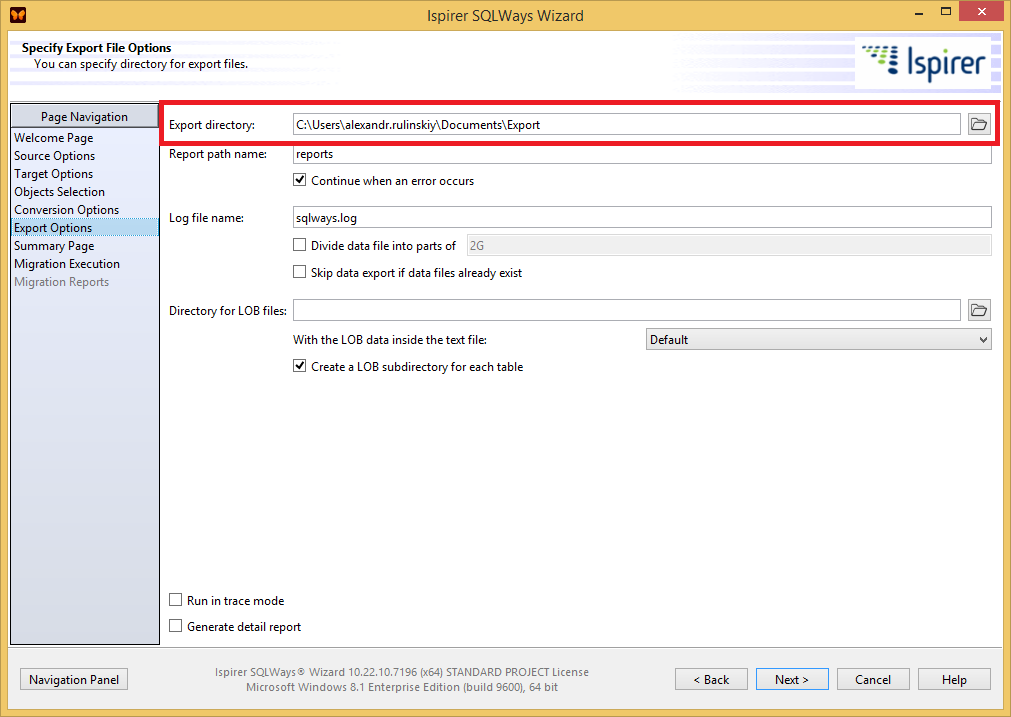
6. Specify Export Directory
After that, you will need to specify Export Directory. This is the directory where our tool will put all the generated files, like sql files with the converted code, txt files with the data, bat or sh files with the commands to the native utilities.
7. Running the Migration
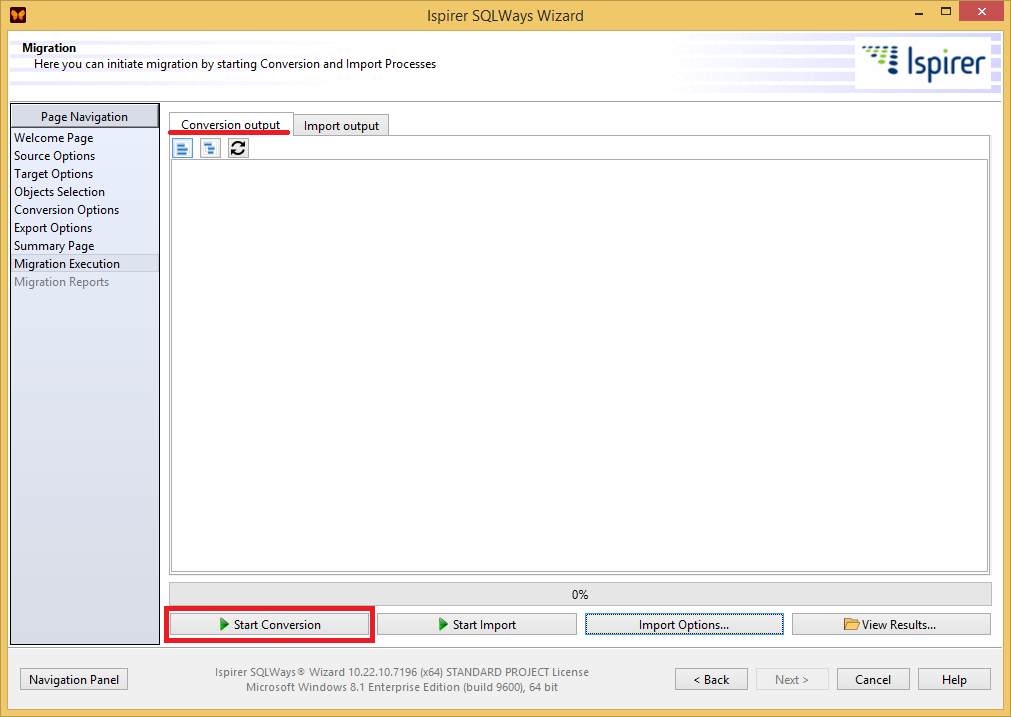
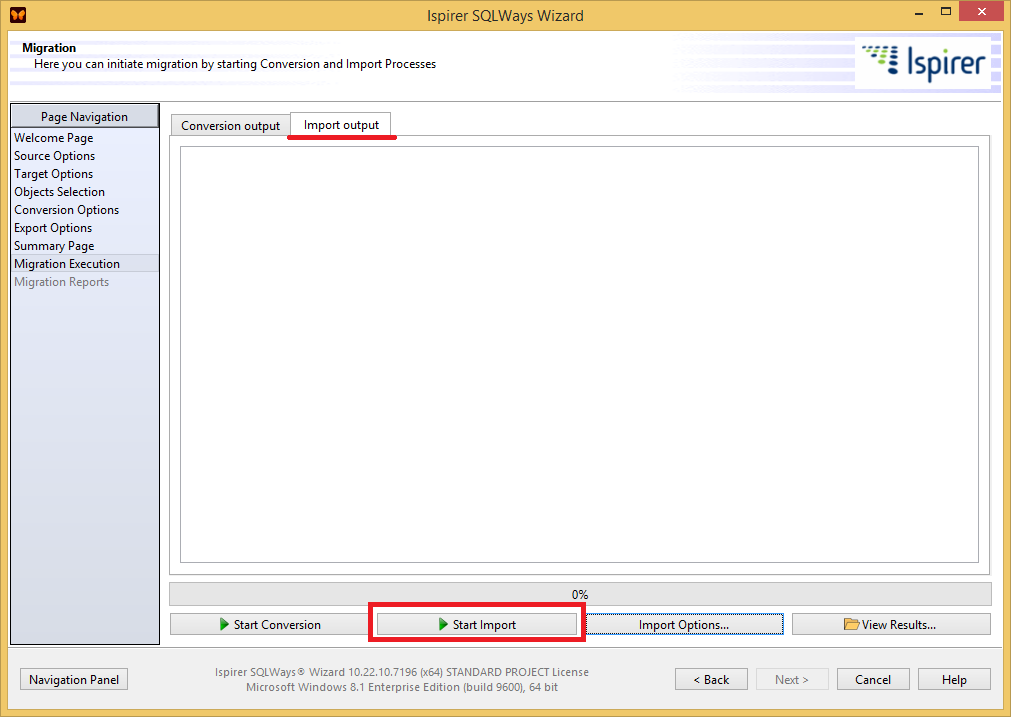
After all these steps we need to run the migration. Migration process itself consist of two steps: “Conversion” and “Import”. During the conversion step our tool extracts information about the objects specified for a conversion, converts them and generates appropriate set of files. During the import step our tool tries to create all the converted objects and data into the target database.
7.1 Conversion Step
To run the conversion process, we need to click “Start Conversion” button on the “Conversion” tab on the “Migration Status” page:
7.2 Import Step
After the conversion process is finished, we need to run the import process. So we need to go to the “Import” tab and click “Start Import” button and import process will be initiated.
7.3 Review the Results
After the migration process you can review all the generated files in the export directory by clicking “View Export” button on the “Conversion” tab. And this button will open a folder that store all the converted results together with the log files - sqlways.log and sqlways_imp.log files. Sqlways.log files stores detailed information about the conversion step and sqlways_imp.log file stores information about the import process.
Other Questions
These steps describes how to make an import process into the target database. If you have some questions or face with some difficulties please contact our support team and provide log files ( sqlways.log and sqlways_imp.log files ) together with detailed description of the case you faced with: support@ispirer.com

